In the time it took you to read this, light went around the Earth at least 10x. 

I Am Graphics And So Can You :: Part 3 :: The First 1,000

I Am Graphics And So Can You :: Part 3 :: The First 1,000


One thing people frequently marvel at is the amount of code Vulkan requires you to write.  I often hear ( and have said ) "It takes 1,000 lines of code just to set things up."  This is absolutely correct.  But!!! Don't dismay.  The impression is that, "man, if it's this difficult to set things up, how difficult is it to do any rendering?"  But this isn't the right impression to have.  Again, I'll let some data convince you.  

In Part 1, I shared a sample video of what VkNeo can do.  Since, I've also fixed shadow volumes, subviews, and other various things.  All that's left are some postprocessing bugs, window resize bugs, and more play time.  At this point in time the total lines of code that are Vulkan specific equals 4,816 across ~12 files.

VkNeo : Vulkan Lines of Code

So 1,000 lines really puts a dent in that final number right?  That owes to Vulkan's philosophy in rendering and that is to eat as much of the cost up front as you can, so nothing is in your way when it comes time to draw.  This is perhaps the biggest difference between Vulkan and OpenGL.  Vulkan works hard before the party so it can let loose later.  OpenGL is running around worried that everyone is having a good time.  

What about shader code? Well thankfully you can write Vulkan shaders in GLSL ( with some differences ), so the amount of code is comparable.  There are roughly 40 shaders in DOOM 3 BFG with VK GLSL totaling 3,875 and GL GLSL totaling over 4,500.  ( A lot of that has to deal with how Neo generates shader code from idTech 4.5's own render prog syntax. )


If I implemented all the debug features native to idTech4.5 I'd have 9-10x lines of code.  And this make Vegeta very happy.

DD2ThvnUIAAXupN.jpg


So let's get ready to party and look at some code.  

NOTE: Take time to read the code comments as they are part of the article.  If you don't, you'll miss out on insights and overall intent.  You don't want to miss out do you?

 
/*
=============
idRenderBackend::Init
=============
*/
void idRenderBackend::Init() {
	idLib::Printf( "----- idRenderBackend::Init -----\n" );

	if ( !VK_Init() ) {
		idLib::FatalError( "Unable to initialize Vulkan" );
	}

	// input and sound systems need to be tied to the new window
	Sys_InitInput();

	// Create the instance
	CreateInstance();

	// Create presentation surface
	CreateSurface();

	// Enumerate physical devices and get their properties
	EnumeratePhysicalDevices();

	// Find queue family/families supporting graphics and present.
	SelectPhysicalDevice();

	// Create logical device and queues
	CreateLogicalDeviceAndQueues();

	// Create semaphores for image acquisition and rendering completion
	CreateSemaphores();

	// Create Command Pool
	CreateCommandPool();

	// Create Command Buffer
	CreateCommandBuffer();

	// Setup the allocator
	vulkanAllocator.Init();

	// Start the Staging Manager
	stagingManager.Init();

	// Create Swap Chain
	CreateSwapChain();

	// Create Render Targets
	CreateRenderTargets();

	// Create Render Pass
	CreateRenderPass();

	// Create Pipeline Cache
	CreatePipelineCache();

	// Create Frame Buffers
	CreateFrameBuffers();

	// Init RenderProg Manager
	renderProgManager.Init();

	// Init Vertex Cache
	vertexCache.Init( vkcontext.gpu->props.limits.minUniformBufferOffsetAlignment );
}
 

Let's take each of these items from top to bottom.  Note that VK_Init simply builds a window, and Sys_InitInput does exactly what you'd think.  So we'll bypass those for now and head straight to our first task.  We need something to render to.  


Creating A Surface

Vulkan does not expose global state.  Instead it follows the idiom of using handles for referencing state. The very first thing you'll create is a Vulkan instance represented by the type ( VkInstance ).  This is the front door to the Vulkan world, and is mainly used for getting information about the hardware environment as well as constructing other handles needed for rendering.  

 
/*
=============
CreateInstance
=============
*/
static void CreateInstance() {
	// Vulkan loves structs.  I mean, really loves structs.
	// Most of Vulkan code is simply filling out structs
	// and submitting that to an API call with the necessary
	// object handles attached.
	VkApplicationInfo appInfo = {};
	appInfo.sType = VK_STRUCTURE_TYPE_APPLICATION_INFO;
	appInfo.pApplicationName = "DOOM";
	appInfo.applicationVersion = 1;
	appInfo.pEngineName = "idTech 4.5";
	appInfo.engineVersion = 1;
	appInfo.apiVersion = VK_MAKE_VERSION( 1, 0, VK_HEADER_VERSION );

	VkInstanceCreateInfo createInfo = {};
	createInfo.sType = VK_STRUCTURE_TYPE_INSTANCE_CREATE_INFO;
	createInfo.pApplicationInfo = &appInfo;

	// This is an idTech CVar. If you're not familiar
	// with them, that's fine.  They are simply an 
	// easy way to change state both at startup
	// and runtime.  This particular one enables Vulkan
	// validation layers. ( Debug information )
	const bool enableLayers = r_vkEnableValidationLayers.GetBool();

	// This is the first time that vkcontext is introduced.
	// It's VkNeo code, and is used to share state 
	// between the various systems needed for rendering.
	vkcontext.instanceExtensions.Clear();
	vkcontext.deviceExtensions.Clear();
	vkcontext.validationLayers.Clear();

	// g_instanceExtensions contains
	// VK_KHR_SURFACE_EXTENSION_NAME
	// VK_KHR_WIN32_SURFACE_EXTENSION_NAME
	for ( int i = 0; i < g_numInstanceExtensions; ++i ) {
		vkcontext.instanceExtensions.Append( g_instanceExtensions[ i ] );
	}

	// g_deviceExtensions contains
	// VK_KHR_SWAPCHAIN_EXTENSION_NAME
	for ( int i = 0; i < g_numDeviceExtensions; ++i ) {
		vkcontext.deviceExtensions.Append( g_deviceExtensions[ i ] );
	}

	if ( enableLayers ) {
		// g_debugInstanceExtensions contains
		// VK_EXT_DEBUG_REPORT_EXTENSION_NAME
		for ( int i = 0; i < g_numDebugInstanceExtensions; ++i ) {
			vkcontext.instanceExtensions.Append( g_debugInstanceExtensions[ i ] );
		}

		// g_validationLayers
		// VK_LAYER_LUNARG_standard_validation
		for ( int i = 0; i < g_numValidationLayers; ++i ) {
			vkcontext.validationLayers.Append( g_validationLayers[ i ] );
		}

		ValidateValidationLayers();
	}

	// Give all the extensions/layers to the create info.
	createInfo.enabledExtensionCount = vkcontext.instanceExtensions.Num();
	createInfo.ppEnabledExtensionNames = vkcontext.instanceExtensions.Ptr();
	createInfo.enabledLayerCount = vkcontext.validationLayers.Num();
	createInfo.ppEnabledLayerNames = vkcontext.validationLayers.Ptr();

	// Make the API call
	ID_VK_CHECK( vkCreateInstance( &createInfo, NULL, &vkcontext.instance ) );

	// Optionally create a debut report which will print
	// out all the information from the validation layers
	if ( enableLayers ) {
		CreateDebugReportCallback();
	}
}
 

The validation layers are extremely helpful, so I suggest using them often.  Now we have our instance and can move onto creating our surface.

 
/*
=============
CreateSurface
=============
*/
static void CreateSurface() {
	// Hey this looks easy!
	// VkNeo is currently windows only, so 
	// we create a windows specific presentation surface.
	// If this were linux, android, or any other platform,
	// we would have to create a surface specifically for it.
	VkWin32SurfaceCreateInfoKHR createInfo = {};
	createInfo.sType = VK_STRUCTURE_TYPE_WIN32_SURFACE_CREATE_INFO_KHR;
	
	// This is the window's application handle.
	createInfo.hinstance = win32.hInstance;
	
	// This is the window's window handle.
	createInfo.hwnd = win32.hWnd;

	// Notice we're feeding our freshly created instance into the API call.
	// Vulkan follows this idiom to a fault.
	ID_VK_CHECK( vkCreateWin32SurfaceKHR( 
		vkcontext.instance, 
		&createInfo, 
		NULL, 
		&vkcontext.surface ) );
}
 

Now we have our presentation surface.  Next we should probably figure out a few things about the hardware environment we're running on.
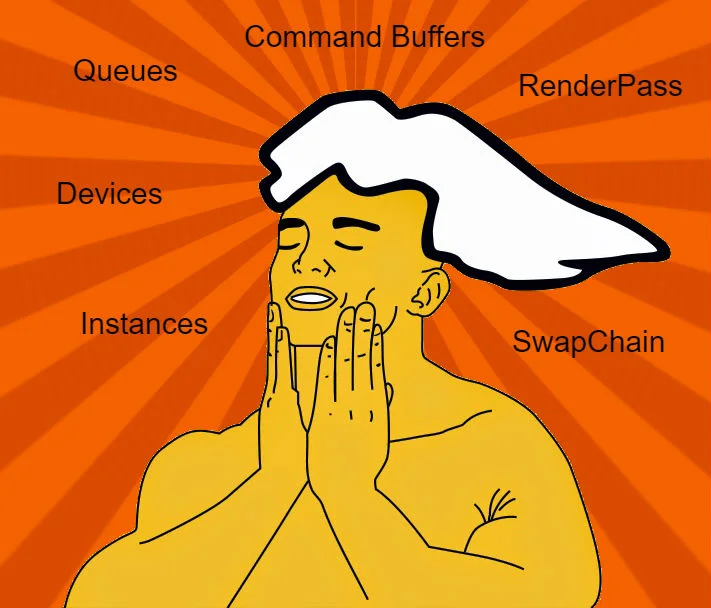
 

Hardware Discovery

You don't always get the luxury of running on fixed hardware, so every good application should take a look at its "situation".  In VkNeo this takes the form of EnumeratePhysicalDevices and finally SelectPhysicalDevice.  The reason for the second one, is that the system might have multiple devices supporting Vulkan.  I wasn't really caring to support SLI/Crossfire for an old game, so I just pick one to use.  

 
/*
=============
EnumeratePhysicalDevices
=============
*/
static void EnumeratePhysicalDevices() {
	// ID_VK_CHECK and ID_VK_VALIDATE are simply macros for checking return values,
	// and then taking action if necessary.

	// First just get the number of devices.
	uint32 numDevices = 0;
	ID_VK_CHECK( vkEnumeratePhysicalDevices( vkcontext.instance, &numDevices, NULL ) );
	ID_VK_VALIDATE( numDevices > 0, "vkEnumeratePhysicalDevices returned zero devices." );

	idList< VkPhysicalDevice > devices;
	devices.SetNum( numDevices );
	
	// Now get the actual devices
	ID_VK_CHECK( vkEnumeratePhysicalDevices( vkcontext.instance, &numDevices, devices.Ptr() ) );
	ID_VK_VALIDATE( numDevices > 0, "vkEnumeratePhysicalDevices returned zero devices." );

	// GPU is a VkNeo struct which stores details about the physical device.
	// We'll use various API calls to get the necessary information.
	vkcontext.gpus.SetNum( numDevices );

	for ( uint32 i = 0; i < numDevices; ++i ) {
		vkGPUInfo_t & gpu = vkcontext.gpus[ i ];
		gpu.device = devices[ i ];

		{
			// First let's get the Queues from the device.  
			// DON'T WORRY I'll explain this in a bit.
			uint32 numQueues = 0;
			vkGetPhysicalDeviceQueueFamilyProperties( gpu.device, &numQueues, NULL );
			ID_VK_VALIDATE( numQueues > 0, "vkGetPhysicalDeviceQueueFamilyProperties returned zero queues." );

			gpu.queueFamilyProps.SetNum( numQueues );
			vkGetPhysicalDeviceQueueFamilyProperties( gpu.device, &numQueues, gpu.queueFamilyProps.Ptr() );
			ID_VK_VALIDATE( numQueues > 0, "vkGetPhysicalDeviceQueueFamilyProperties returned zero queues." );
		}

		{
			// Next let's get the extensions supported by the device.
			uint32 numExtension;
			ID_VK_CHECK( vkEnumerateDeviceExtensionProperties( gpu.device, NULL, &numExtension, NULL ) );
			ID_VK_VALIDATE( numExtension > 0, "vkEnumerateDeviceExtensionProperties returned zero extensions." );

			gpu.extensionProps.SetNum( numExtension );
			ID_VK_CHECK( vkEnumerateDeviceExtensionProperties( gpu.device, NULL, &numExtension, gpu.extensionProps.Ptr() ) );
			ID_VK_VALIDATE( numExtension > 0, "vkEnumerateDeviceExtensionProperties returned zero extensions." );
		}

		// Surface capabilities basically describes what kind of image you can render to the user.
		// Look up VkSurfaceCapabilitiesKHR in the Vulkan documentation.
		ID_VK_CHECK( vkGetPhysicalDeviceSurfaceCapabilitiesKHR( gpu.device, vkcontext.surface, &gpu.surfaceCaps ) );

		{
			// Get the supported surface formats.  This includes image format and color space.
			// A common format is VK_FORMAT_R8G8B8A8_UNORM which is 8 bits for red, green, blue, alpha making for 32 total
			uint32 numFormats;
			ID_VK_CHECK( vkGetPhysicalDeviceSurfaceFormatsKHR( gpu.device, vkcontext.surface, &numFormats, NULL ) );
			ID_VK_VALIDATE( numFormats > 0, "vkGetPhysicalDeviceSurfaceFormatsKHR returned zero surface formats." );

			gpu.surfaceFormats.SetNum( numFormats );
			ID_VK_CHECK( vkGetPhysicalDeviceSurfaceFormatsKHR( gpu.device, vkcontext.surface, &numFormats, gpu.surfaceFormats.Ptr() ) );
			ID_VK_VALIDATE( numFormats > 0, "vkGetPhysicalDeviceSurfaceFormatsKHR returned zero surface formats." );
		}

		{
			// Vulkan supports multiple presentation modes, and I'll linkn to some good documentation on that in just a bit.
			uint32 numPresentModes;
			ID_VK_CHECK( vkGetPhysicalDeviceSurfacePresentModesKHR( gpu.device, vkcontext.surface, &numPresentModes, NULL ) );
			ID_VK_VALIDATE( numPresentModes > 0, "vkGetPhysicalDeviceSurfacePresentModesKHR returned zero present modes." );

			gpu.presentModes.SetNum( numPresentModes );
			ID_VK_CHECK( vkGetPhysicalDeviceSurfacePresentModesKHR( gpu.device, vkcontext.surface, &numPresentModes, gpu.presentModes.Ptr() ) );
			ID_VK_VALIDATE( numPresentModes > 0, "vkGetPhysicalDeviceSurfacePresentModesKHR returned zero present modes." );
		}

		// Almost done! Up next wee get the memory types supported by the device.
		// This will be needed later once we start allocating memory for buffers, images, etc.
		vkGetPhysicalDeviceMemoryProperties( gpu.device, &gpu.memProps );

		// Lastly we get the actual device properties.
		// Of note this includes a MASSIVE struct (VkPhysicalDeviceLimits) which outlines 
		// all possible limits you could run into when attemptin to render.
		vkGetPhysicalDeviceProperties( gpu.device, &gpu.props );
	}
}
 

Those new to graphics are usually overwhelmed by the volume of choices for options.  For example VkFormat has over 180!  But take heart, normally you'll only use a small subset of these and I'll try to point out which ones matter.  For instance, of those 180, VkNeo only uses about ~12.  

The other notable thing is presentation mode.  This could easily be a blog post unto itself.  For beginners it's safe enough to say, just take the best one available.  And that will come up in the next function.  If you want to dig deeper go to vulkan-spec and search for vkGetPhysicalDeviceSurfacePresentModesKHR.  

 
/*
=============
SelectPhysicalDevice
=============
*/
static void SelectPhysicalDevice() {
	// Let's pick a GPU!
	for ( int i = 0; i < vkcontext.gpus.Num(); ++i ) {
		vkGPUInfo_t & gpu = vkcontext.gpus[ i ];

		// This is again related to queues.  Don't worry I'll get there soon.
		int graphicsIdx = -1;
		int presentIdx = -1;

		// Remember when we created our instance we got all those device extensions?
		// Now we need to make sure our physical device supports them.
		if ( !CheckPhysicalDeviceExtensionSupport( gpu, vkcontext.deviceExtensions ) ) {
			continue;
		}

		// No surface formats? =(
		if ( gpu.surfaceFormats.Num() == 0 ) {
			continue;
		}

		// No present modes? =(
		if ( gpu.presentModes.Num() == 0 ) {
			continue;
		}

		// Now we'll loop through the queue family properties looking
		// for both a graphics and a present queue.
		// The index could actually end up being the same, and from 
		// my experience they are.  But via the spec, you're not 
		// guaranteed that luxury.  So best be on the safe side.

		// Find graphics queue family
		for ( int j = 0; j < gpu.queueFamilyProps.Num(); ++j ) {
			VkQueueFamilyProperties & props = gpu.queueFamilyProps[ j ];

			if ( props.queueCount == 0 ) {
				continue;
			}

			if ( props.queueFlags & VK_QUEUE_GRAPHICS_BIT ) {
				// Got it!
				graphicsIdx = j;
				break;
			}
		}

		// Find present queue family
		for ( int j = 0; j < gpu.queueFamilyProps.Num(); ++j ) {
			VkQueueFamilyProperties & props = gpu.queueFamilyProps[ j ];

			if ( props.queueCount == 0 ) {
				continue;
			}

			// A rather perplexing call in the Vulkan API, but
			// it is a necessity to call.
			VkBool32 supportsPresent = VK_FALSE;
			vkGetPhysicalDeviceSurfaceSupportKHR( gpu.device, j, vkcontext.surface, &supportsPresent );
			if ( supportsPresent ) {
				// Got it!
				presentIdx = j;
				break;
			}
		}

		// Did we find a device supporting both graphics and present.
		if ( graphicsIdx >= 0 && presentIdx >= 0 ) {
			vkcontext.graphicsFamilyIdx = graphicsIdx;
			vkcontext.presentFamilyIdx = presentIdx;
			vkcontext.physicalDevice = gpu.device;
			vkcontext.gpu = &gpu;
			return;
		}
	}

	// If we can't render or present, just bail.
	// DIAF
	idLib::FatalError( "Could not find a physical device which fits our desired profile" );
}
 

I keep promising to bring up queues.  They are the unsurprisingly what you submit work to.  When you eventually start sending commands to the GPU, they will be given to a queue.  Queues are a way for the hardware vendor to represent capabilities to you the software developer.  There are graphics queues, transfer queues, compute queues, etc.  Really for beginners you only need to worry about graphics and if it supports present.  Hey, I know!  Let's go create some queues now.


Work Work Work

Now we get to two of the most often referenced things in the Vulkan API; the logical device ( VkDevice ) and the queue ( VkQueue ).  I just talked about the queue, but what is the device?  "I thought we already went through the physical devices" you might say.  The logical device is simply an interface to the physical device.  It exposes the underlying API of interacting with the device.  Let's take a look.

 
/*
=============
CreateLogicalDeviceAndQueues
=============
*/
static void CreateLogicalDeviceAndQueues() {
	// Add each family index to a list.
	// Don't do duplicates
	idList< int > uniqueIdx;
	uniqueIdx.AddUnique( vkcontext.graphicsFamilyIdx );
	uniqueIdx.AddUnique( vkcontext.presentFamilyIdx );
	
	idList< VkDeviceQueueCreateInfo > devqInfo;

	const float priority = 1.0f;
	for ( int i = 0; i < uniqueIdx.Num(); ++i ) {
		VkDeviceQueueCreateInfo qinfo = {};
		qinfo.sType = VK_STRUCTURE_TYPE_DEVICE_QUEUE_CREATE_INFO;
		qinfo.queueFamilyIndex = uniqueIdx[ i ];
		qinfo.queueCount = 1;

		// Don't worry about priority
		qinfo.pQueuePriorities = &priority;

		devqInfo.Append( qinfo );
	}

	// These are some features that are enabled for VkNeo
	// If you try to make an API call down the road which 
	// requires something be enabled, you'll more than likely
	// get a validation message telling you what to enable.
	// Thanks Vulkan!
	VkPhysicalDeviceFeatures deviceFeatures = {};
	deviceFeatures.textureCompressionBC = VK_TRUE;
	deviceFeatures.imageCubeArray = VK_TRUE;
	deviceFeatures.depthClamp = VK_TRUE;
	deviceFeatures.depthBiasClamp = VK_TRUE;
	deviceFeatures.depthBounds = VK_TRUE;
	deviceFeatures.fillModeNonSolid = VK_TRUE;

	// Put it all together.
	VkDeviceCreateInfo info = {};
	info.sType = VK_STRUCTURE_TYPE_DEVICE_CREATE_INFO;
	info.queueCreateInfoCount = devqInfo.Num();
	info.pQueueCreateInfos = devqInfo.Ptr();
	info.pEnabledFeatures = &deviceFeatures;
	info.enabledExtensionCount = vkcontext.deviceExtensions.Num();
	info.ppEnabledExtensionNames = vkcontext.deviceExtensions.Ptr();

	// If validation layers are enabled supply them here.
	if ( r_vkEnableValidationLayers.GetBool() ) {
		info.enabledLayerCount = vkcontext.validationLayers.Num();
		info.ppEnabledLayerNames = vkcontext.validationLayers.Ptr();
	} else {
		info.enabledLayerCount = 0;
	}

	// Create the device
	ID_VK_CHECK( vkCreateDevice( vkcontext.physicalDevice, &info, NULL, &vkcontext.device ) );

	// Now get the queues from the devie we just created.
	vkGetDeviceQueue( vkcontext.device, vkcontext.graphicsFamilyIdx, 0, &vkcontext.graphicsQueue );
	vkGetDeviceQueue( vkcontext.device, vkcontext.presentFamilyIdx, 0, &vkcontext.presentQueue );
}
 

As you can see this was fairly straight forward.  The next few items aren't necessarily order dependent, but it's just how I chose to implement things.  

In Vulkan it's your responsibility to properly synchronize access to resources.  ( This can sound scary if you're a beginner, but don't worry.  I'll dispel the fog for you )  The primary thing you synchronize access to are the images you're rendering to and the images you are presenting.  There are many means of synchronization in Vulkan, but for this task we'll use semaphores ( VkSemaphore ).

 
/*
=============
CreateSemaphores
=============
*/
static void CreateSemaphores() {
	VkSemaphoreCreateInfo semaphoreCreateInfo = {};
	semaphoreCreateInfo.sType = VK_STRUCTURE_TYPE_SEMAPHORE_CREATE_INFO;

	for ( int i = 0; i < NUM_FRAME_DATA; ++i ) {
		ID_VK_CHECK( vkCreateSemaphore( vkcontext.device, &semaphoreCreateInfo, NULL, &vkcontext.acquireSemaphores[ i ] ) );
		ID_VK_CHECK( vkCreateSemaphore( vkcontext.device, &semaphoreCreateInfo, NULL, &vkcontext.renderCompleteSemaphores[ i ] ) );
	}
}
 

Well that was simple!  Notice I'm creating semaphores for NUM_FRAME_DATA.  This is because in VkNeo I double buffer my frame data.  Those familiar with double buffering get it.  But if you're a beginner all it means is while you're showing one image, you're building the next one.  Then when you're done working on one image you display it and use the previous one to begin the next frame.  

You know what.  Enough talk.  Time for a video intermission.

Now let's move on with command buffers.  Command buffers are your way of instructing the GPU.  A lot of the "active" Vulkan API takes a command buffer as an argument.  Think of it like a server taking your order at a restaurant.  They write down your intent and expected outcome, and then take that back to the kitchen ( the GPU ).  The kitchen then translates your order into specific instructions it needs to perform in order to produce the outcome you expect when your food is finally delivered.  

 
/*
=============
CreateCommandPool
=============
*/
static void CreateCommandPool() {
	// Because command buffers can be very flexible, we don't want to be 
	// doing a lot of allocation while we're trying to render.
	// For this reason we create a pool to hold allocated command buffers.
	VkCommandPoolCreateInfo commandPoolCreateInfo = {};
	commandPoolCreateInfo.sType = VK_STRUCTURE_TYPE_COMMAND_POOL_CREATE_INFO;
	
	// This allows the command buffer to be implicitly reset when vkBeginCommandBuffer is called.
	// You can also explicitly call vkResetCommandBuffer.  
	commandPoolCreateInfo.flags = VK_COMMAND_POOL_CREATE_RESET_COMMAND_BUFFER_BIT;
	
	// We'll be building command buffers to send to the graphics queue
	commandPoolCreateInfo.queueFamilyIndex = vkcontext.graphicsFamilyIdx;

	ID_VK_CHECK( vkCreateCommandPool( vkcontext.device, &commandPoolCreateInfo, NULL, &vkcontext.commandPool ) );
}

/*
=============
CreateCommandBuffer
=============
*/
static void CreateCommandBuffer() {
	VkCommandBufferAllocateInfo commandBufferAllocateInfo = {};
	commandBufferAllocateInfo.sType = VK_STRUCTURE_TYPE_COMMAND_BUFFER_ALLOCATE_INFO;
	
	// Don't worry about this
	commandBufferAllocateInfo.level = VK_COMMAND_BUFFER_LEVEL_PRIMARY;
	
	// The command pool we created above
	commandBufferAllocateInfo.commandPool = vkcontext.commandPool;
	
	// We'll have two command buffers.  One will be in flight
	// while the other is being built.
	commandBufferAllocateInfo.commandBufferCount = NUM_FRAME_DATA;

	// You can allocate multiple command buffers at once.
	ID_VK_CHECK( vkAllocateCommandBuffers( vkcontext.device, &commandBufferAllocateInfo, vkcontext.commandBuffer.Ptr() ) );

	// We create fences that we can use to wait for a 
	// given command buffer to be done on the GPU.
	VkFenceCreateInfo fenceCreateInfo = {};
	fenceCreateInfo.sType = VK_STRUCTURE_TYPE_FENCE_CREATE_INFO;

	for ( int i = 0; i < NUM_FRAME_DATA; ++i ) {
		ID_VK_CHECK( vkCreateFence( vkcontext.device, &fenceCreateInfo, NULL, &vkcontext.commandBufferFences[ i ] ) );
	}
}
 

Notice the addition of a new synchronization primitive?  This time it's a fence.  I use these to wait until a previous command buffer is done.  

I'm going to skip over this next part.  The idVulkanAllocator and idVulkanStagingManager relate to memory management and getting things to and from the GPU.  For that reason they deserve their own article.  

 
	// Setup the allocator
	vulkanAllocator.Init();

	// Start the Staging Manager
	stagingManager.Init();

/*
See you soon guys!

____            ___       .  ,,  ,, .
 ', \,__   __,'',/      . .:>}}Y{{<:. .'
   \    \/'   ./       ' .'. ''W' ' .' .
     \       /                 "
       \    /      ,-----------"--,
        |   \____/'            /-\ \                          Row faster!
         \                    ' .O  `\                       /
          |          ,--     |\_______)               O    O
           |       <'   ,     "/ / / /      ' .'; __ /N___/N____
            `,      '~~~'    /'/'/'/'       .',.'.`/'         /'
 ~~~~~~~~~~~~~~~~~~~~~~~~~~~~~~~~~~~~~~~~~~~~~~~~~D~~~~~~~~~~~~~~~~~~~~~~~~~
*/


Actual Rendering Resources

Ok so now we're getting into actual rendering resources.  First we'll start by introducing the SwapChain.  Basically this is just a collection of images provided to you from the device.  Like in my double buffering video, the two sheets of paper I was playing tic-tac-toe on represent the swap chain images.  Let's acquire them now.

 
/*
=============
ChooseSurfaceFormat
=============
*/
VkSurfaceFormatKHR ChooseSurfaceFormat( idList< VkSurfaceFormatKHR > & formats ) {
	VkSurfaceFormatKHR result;
	
	// If Vulkan returned an unknown format, then just force what we want.
	if ( formats.Num() == 1 && formats[ 0 ].format == VK_FORMAT_UNDEFINED ) {
		result.format = VK_FORMAT_B8G8R8A8_UNORM;
		result.colorSpace = VK_COLOR_SPACE_SRGB_NONLINEAR_KHR;
		return result;
	}

	// Favor 32 bit rgba and srgb nonlinear colorspace
	for ( int i = 0; i < formats.Num(); ++i ) {
		VkSurfaceFormatKHR & fmt = formats[ i ];
		if ( fmt.format == VK_FORMAT_B8G8R8A8_UNORM && fmt.colorSpace == VK_COLOR_SPACE_SRGB_NONLINEAR_KHR ) {
			return fmt;
		}
	}

	// If all else fails, just return what's available
	return formats[ 0 ];
}

/*
=============
ChoosePresentMode
=============
*/
VkPresentModeKHR ChoosePresentMode( idList< VkPresentModeKHR > & modes ) {
	const VkPresentModeKHR desiredMode = VK_PRESENT_MODE_MAILBOX_KHR;

	// Favor looking for mailbox mode.
	for ( int i = 0; i < modes.Num(); ++i ) {
		if ( modes[ i ] == desiredMode ) {
			return desiredMode;
		}
	}

	// If we couldn't find mailbox, then default to FIFO which is always available.
	return VK_PRESENT_MODE_FIFO_KHR;
}

/*
=============
ChooseSurfaceExtent
=============
*/
VkExtent2D ChooseSurfaceExtent( VkSurfaceCapabilitiesKHR & caps ) {
	VkExtent2D extent;

	// The extent is typically the size of the window we created the surface from.
	// However if Vulkan returns -1 then simply substitute the window size.
	if ( caps.currentExtent.width == -1 ) {
		extent.width = win32.nativeScreenWidth;
		extent.height = win32.nativeScreenHeight;
	} else {
		extent = caps.currentExtent;
	}

	return extent;
}

/*
=============
CreateSwapChain
=============
*/
static void CreateSwapChain() {
	vkGPUInfo_t & gpu = *vkcontext.gpu;

	// Take our selected gpu and pick three things.
	// 1.) Surface format as described earlier.
	// 2.) Present mode. Again refer to documentation I shared.
	// 3.) Surface extent is basically just the size ( width, height ) of the image.
	VkSurfaceFormatKHR surfaceFormat = ChooseSurfaceFormat( gpu.surfaceFormats );
	VkPresentModeKHR presentMode = ChoosePresentMode( gpu.presentModes );
	VkExtent2D extent = ChooseSurfaceExtent( gpu.surfaceCaps );

	VkSwapchainCreateInfoKHR info = {};
	info.sType = VK_STRUCTURE_TYPE_SWAPCHAIN_CREATE_INFO_KHR;
	info.surface = vkcontext.surface;

	// double buffer again!
	info.minImageCount = NUM_FRAME_DATA;

	info.imageFormat = surfaceFormat.format;
	info.imageColorSpace = surfaceFormat.colorSpace;
	info.imageExtent = extent;
	info.imageArrayLayers = 1;

	// Aha! Something new.  There are only 8 potential bits that can be used here
	// and I'm using two.  Essentially this is what they mean.
	// VK_IMAGE_USAGE_COLOR_ATTACHMENT_BIT - This is a color image I'm rendering into.
	// VK_IMAGE_USAGE_TRANSFER_SRC_BIT - I'll be copying this image somewhere. ( screenshot, postprocess )
	info.imageUsage = VK_IMAGE_USAGE_COLOR_ATTACHMENT_BIT | VK_IMAGE_USAGE_TRANSFER_SRC_BIT;

	// Moment of truth.  If the graphics queue family and present family don't match
	// then we need to create the swapchain with different information.
	if ( vkcontext.graphicsFamilyIdx != vkcontext.presentFamilyIdx ) {
		uint32 indices[] = { (uint32)vkcontext.graphicsFamilyIdx, (uint32)vkcontext.presentFamilyIdx };

		// There are only two sharing modes.  This is the one to use
		// if images are not exclusive to one queue.
		info.imageSharingMode = VK_SHARING_MODE_CONCURRENT;
		info.queueFamilyIndexCount = 2;
		info.pQueueFamilyIndices = indices;
	} else {
		// If the indices are the same, then the queue can have exclusive
		// access to the images.
		info.imageSharingMode = VK_SHARING_MODE_EXCLUSIVE;
	}

	// We just want to leave the image as is.
	info.preTransform = VK_SURFACE_TRANSFORM_IDENTITY_BIT_KHR;
	info.compositeAlpha = VK_COMPOSITE_ALPHA_OPAQUE_BIT_KHR;
	info.presentMode = presentMode;

	// Is Vulkan allowed to discard operations outside of the renderable space?
	info.clipped = VK_TRUE;

	// Create the swapchain
	ID_VK_CHECK( vkCreateSwapchainKHR( vkcontext.device, &info, NULL, &vkcontext.swapchain ) );

	// Save off swapchain details
	vkcontext.swapchainFormat = surfaceFormat.format;
	vkcontext.presentMode = presentMode;
	vkcontext.swapchainExtent = extent;

	// Retrieve the swapchain images from the device.
	// Note that VkImage is simply a handle like everything else.

	// First call gets numImages.
	uint32 numImages = 0;
	idArray< VkImage, NUM_FRAME_DATA > swapchainImages;
	ID_VK_CHECK( vkGetSwapchainImagesKHR( vkcontext.device, vkcontext.swapchain, &numImages, NULL ) );
	ID_VK_VALIDATE( numImages > 0, "vkGetSwapchainImagesKHR returned a zero image count." );

	// Second call uses numImages
	ID_VK_CHECK( vkGetSwapchainImagesKHR( vkcontext.device, vkcontext.swapchain, &numImages, swapchainImages.Ptr() ) );
	ID_VK_VALIDATE( numImages > 0, "vkGetSwapchainImagesKHR returned a zero image count." );

	// New concept - Image Views
	// Much like the logical device is an interface to the physical device,
	// image views are interfaces to actual images.  Think of it as this.
	// The image exists outside of you.  But the view is your personal view 
	// ( how you perceive ) the image.
	for ( uint32 i = 0; i < NUM_FRAME_DATA; ++i ) {
		VkImageViewCreateInfo imageViewCreateInfo = {};
		imageViewCreateInfo.sType = VK_STRUCTURE_TYPE_IMAGE_VIEW_CREATE_INFO;

		// Just plug it in
		imageViewCreateInfo.image = swapchainImages[ i ];

		// These are 2D images
		imageViewCreateInfo.viewType = VK_IMAGE_VIEW_TYPE_2D;

		// The selected format
		imageViewCreateInfo.format = vkcontext.swapchainFormat;

		// We don't need to swizzle ( swap around ) any of the 
		// color channels
		imageViewCreateInfo.components.r = VK_COMPONENT_SWIZZLE_R;
		imageViewCreateInfo.components.g = VK_COMPONENT_SWIZZLE_G;
		imageViewCreateInfo.components.b = VK_COMPONENT_SWIZZLE_B;
		imageViewCreateInfo.components.a = VK_COMPONENT_SWIZZLE_A;

		// There are only 4x aspect bits.  And most people will only use 3x.
		// These determine what is affected by your image operations.
		// VK_IMAGE_ASPECT_COLOR_BIT
		// VK_IMAGE_ASPECT_DEPTH_BIT
		// VK_IMAGE_ASPECT_STENCIL_BIT
		imageViewCreateInfo.subresourceRange.aspectMask = VK_IMAGE_ASPECT_COLOR_BIT;

		// For beginners - a base mip level of zero is par for the course.
		imageViewCreateInfo.subresourceRange.baseMipLevel = 0;

		// Level count is the # of images visible down the mip chain.
		// So basically just 1...
		imageViewCreateInfo.subresourceRange.levelCount = 1;
		// We don't have multiple layers to these images.
		imageViewCreateInfo.subresourceRange.baseArrayLayer = 0;
		imageViewCreateInfo.subresourceRange.layerCount = 1;
		imageViewCreateInfo.flags = 0;
		
		// Create the view
		VkImageView imageView;
		ID_VK_CHECK( vkCreateImageView( vkcontext.device, &imageViewCreateInfo, NULL, &imageView ) );

		// Now store this off in an idImage so we can take advantage
		// of that class's API
		idImage * image = new idImage( va( "_swapchain%d", i ) );
		image->CreateFromSwapImage( 
			swapchainImages[ i ], 
			imageView, 
			vkcontext.swapchainFormat, 
			vkcontext.swapchainExtent );
		vkcontext.swapchainImages[ i ] = image;
	}
}
 

The code comments do a fairly good job describing what's going on.  By now though you can start to get a feel for how you work with Vulkan.  The idioms I find fairly pleasant.  The difficulty really is understanding all the options available to you.  To that end I encourage you to take time to read about specific options if you find yourself perplexed.  Vulkan's documentation is very thorough, and I can also heartily recommend Graham Seller's red book.  ( See bottom of article for link )

Ok, so we have some color images, but what about a depth buffer?  ( If you're brand spanking new to graphics let me know and I'll write an article covering that )  It's up to us to create a depth buffer, Vulkan don't care.  

 
/*
=============
ChooseSupportedFormat
=============
*/
static VkFormat ChooseSupportedFormat( VkFormat * formats, int numFormats, VkImageTiling tiling, VkFormatFeatureFlags features ) {
	for ( int i = 0; i < numFormats; ++i ) {
		VkFormat format = formats[ i ];

		VkFormatProperties props;
		vkGetPhysicalDeviceFormatProperties( vkcontext.physicalDevice, format, &props );

		if ( tiling == VK_IMAGE_TILING_LINEAR && ( props.linearTilingFeatures & features ) == features ) {
			return format;
		} else if ( tiling == VK_IMAGE_TILING_OPTIMAL && ( props.optimalTilingFeatures & features ) == features ) {
			return format;
		}
	}

	idLib::FatalError( "Failed to find a supported format." );

	return VK_FORMAT_UNDEFINED;
}

/*
=============
CreateRenderTargets
=============
*/
static void CreateRenderTargets() {
	// Select Depth Format, prefer as high a precision as we can get.
	{
		VkFormat formats[] = {  
			VK_FORMAT_D32_SFLOAT_S8_UINT, 
			VK_FORMAT_D24_UNORM_S8_UINT 
		};
		// Make sure to check it supports optimal tiling and is a depth/stencil format.
		vkcontext.depthFormat = ChooseSupportedFormat( 
			formats, 2, 
			VK_IMAGE_TILING_OPTIMAL, 
			VK_FORMAT_FEATURE_DEPTH_STENCIL_ATTACHMENT_BIT );
	}

	// idTech4.5 does have an independent idea of a depth attachment
	// So now that the context contains the selected format we can simply
	// create the internal one.
	idImageOpts depthOptions;
	depthOptions.format = FMT_DEPTH;
	depthOptions.width = renderSystem->GetWidth();
	depthOptions.height = renderSystem->GetHeight();
	depthOptions.numLevels = 1;

	globalImages->ScratchImage( "_viewDepth", depthOptions );
}
 

Now that we have actual images to render into let's move onto probably one of the more perplexing concepts in Vulkan.  The VkRenderPass is definitely something that takes some getting used to.  Essentially the renderpass is an orchestration of image data.  It helps the GPU better understand when you'll be drawing, what you'll be drawing to, and what it should do between render passes.  I promise after hearing that, and looking at the code, things will start to make sense.  

 
/*
=============
CreateRenderPass
=============
*/
static void CreateRenderPass() {
	idList< VkAttachmentDescription > attachments;

	// VkNeo uses a single renderpass, so I just create it on startup.
	// Attachments act as slots in which to insert images.

	// For the color attachment, we'll simply be using the swapchain images.
	VkAttachmentDescription colorAttachment = {};
	colorAttachment.format = vkcontext.swapchainFormat;
	// Sample count goes from 1 - 64
	colorAttachment.samples = VK_SAMPLE_COUNT_1_BIT;
	// I don't care what you do with the image memory when you load it for use.
	colorAttachment.loadOp = VK_ATTACHMENT_LOAD_OP_DONT_CARE;
	// Just store the image when you go to store it.
	colorAttachment.storeOp = VK_ATTACHMENT_STORE_OP_STORE;
	// I don't care what the initial layout of the image is.
	colorAttachment.initialLayout = VK_IMAGE_LAYOUT_UNDEFINED;
	// It better be ready to present to the user when we're done with the renderpass.
	colorAttachment.finalLayout = VK_IMAGE_LAYOUT_PRESENT_SRC_KHR;
	attachments.Append( colorAttachment );

	// For the depth attachment, we'll be using the _viewDepth we just created.
	VkAttachmentDescription depthAttachment = {};
	depthAttachment.format = vkcontext.depthFormat;
	depthAttachment.samples = VK_SAMPLE_COUNT_1_BIT;
	depthAttachment.loadOp = VK_ATTACHMENT_LOAD_OP_DONT_CARE;
	depthAttachment.storeOp = VK_ATTACHMENT_STORE_OP_DONT_CARE;
	depthAttachment.initialLayout = VK_IMAGE_LAYOUT_UNDEFINED;
	depthAttachment.finalLayout = VK_IMAGE_LAYOUT_DEPTH_STENCIL_ATTACHMENT_OPTIMAL;
	attachments.Append( depthAttachment );

	// Now we enumerate the attachments for a subpass.  We have to have at least one subpass.
	VkAttachmentReference colorRef = {};
	colorRef.attachment = 0;
	colorRef.layout = VK_IMAGE_LAYOUT_COLOR_ATTACHMENT_OPTIMAL;

	VkAttachmentReference depthRef = {};
	depthRef.attachment = 1;
	depthRef.layout = VK_IMAGE_LAYOUT_DEPTH_STENCIL_ATTACHMENT_OPTIMAL;

	// Basically is this graphics or compute
	VkSubpassDescription subpass = {};
	subpass.pipelineBindPoint = VK_PIPELINE_BIND_POINT_GRAPHICS;
	subpass.colorAttachmentCount = 1;
	subpass.pColorAttachments = &colorRef;
	subpass.pDepthStencilAttachment = &depthRef;

	VkRenderPassCreateInfo renderPassCreateInfo = {};
	renderPassCreateInfo.sType = VK_STRUCTURE_TYPE_RENDER_PASS_CREATE_INFO;
	renderPassCreateInfo.attachmentCount = attachments.Num();
	renderPassCreateInfo.pAttachments = attachments.Ptr();
	renderPassCreateInfo.subpassCount = 1;
	renderPassCreateInfo.pSubpasses = &subpass;
	renderPassCreateInfo.dependencyCount = 0;

	ID_VK_CHECK( vkCreateRenderPass( vkcontext.device, &renderPassCreateInfo, NULL, &vkcontext.renderPass ) );
}
 

See not so bad, right?  While it is an oddity, it's something you can easily come back to.  As I mentioned, I only have one, and look what I can accomplish with that!

There's one last thing we need to talk about, and that's Frame Buffers.

 
/*
=============
CreateFrameBuffers
=============
*/
static void CreateFrameBuffers() {
	VkImageView attachments[ 2 ];

	// Depth attachment is the same
	// We never show the depth buffer, so we only ever need one.
	idImage * depthImg = globalImages->GetImage( "_viewDepth" );
	if ( depthImg == NULL ) {
		idLib::FatalError( "CreateFrameBuffers: No _viewDepth image." );
	}

	attachments[ 1 ] = depthImg->GetView();

	// VkFrameBuffer is what maps attachments to a renderpass.  That's really all it is.
	VkFramebufferCreateInfo frameBufferCreateInfo = {};
	frameBufferCreateInfo.sType = VK_STRUCTURE_TYPE_FRAMEBUFFER_CREATE_INFO;
	// The renderpass we just created.
	frameBufferCreateInfo.renderPass = vkcontext.renderPass;
	// The color and depth attachments
	frameBufferCreateInfo.attachmentCount = 2;
	frameBufferCreateInfo.pAttachments = attachments;
	// Current render size
	frameBufferCreateInfo.width = renderSystem->GetWidth();
	frameBufferCreateInfo.height = renderSystem->GetHeight();
	frameBufferCreateInfo.layers = 1;

	// Because we're double buffering, we need to create the same number of framebuffers.
	// The main difference again is that both of them use the same depth image view.
	for ( int i = 0; i < NUM_FRAME_DATA; ++i ) {
		attachments[ 0 ] = vkcontext.swapchainImages[ i ]->GetView();
		ID_VK_CHECK( vkCreateFramebuffer( vkcontext.device, &frameBufferCreateInfo, NULL, &vkcontext.frameBuffers[ i ] ) );
	}
}
 

We made it!  Time to party!  

Obviously I did skip a few things, but that's because I want to save them so we can give them the focus they deserve.  Instead of coping out on you, I'll explain specifically why.

  • idVulkanAllocator - Memory management is easily an article in itself.
  • idVulkanStagingManager - This gets into resource management for the game.
  • idRenderProgManager - This deals with Vulkan pipelines and is arguably the most important part of using Vulkan
  • idVertexCache - Again this deals with resource management and warrants its own discussion.

Well thanks for making it this far!  I hope you find some of this helpful.  I do intend to open source VkNeo soon so you'll be able to look at the full code for yourself.  In the meantime if you have any comments, corrections, or solid trolls please share.

P.S. If you've made it this far, remember you've put a solid dent in getting things rendering.  This easily accounts for 20% of VkNeo's Vulkan code.  So hang in there, you've learned a lot today.  Next we'll tackle memory and resource management.

Cheers


I Am Graphics And So Can You :: Part 4 :: Resources Rush The Stage

I Am Graphics And So Can You :: Part 4 :: Resources Rush The Stage

I Am Graphics And So Can You :: Part 2 :: Intuition

I Am Graphics And So Can You :: Part 2 :: Intuition